

 Disney Magical World is a Simulation Adventure game for the 3DS based off a Japanese-only Web game. This game has many different activities you can do while being in a world with many of your favorite Disney characters. It is often referred to as similar to Animal Crossing, but other than customization/collecting and being in real time, I’d say it’s closer to Fantasy Life or Harvest Moon/Rune Factory. However, if you do enjoy Animal Crossing and/or Harvest Moon (or Disney in general), I do think the game is worth looking at. The game isn’t perfect, but its good outshines the flaws and it has a lot more layers and difficulty than you’d expect.
The Basics, Customization, and Collecting
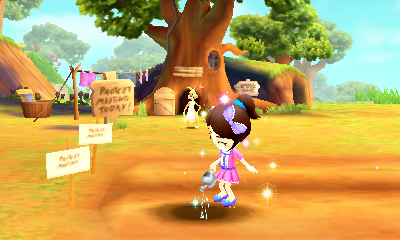
Disney Magical World starts with you receiving an invitation from a Magical Letter named Letitia (nicknamed Letta) who gives you a passport to Castleton (A hub for each of the different worlds and where various Disney characters come and visit) where you can start to create your character either from the ingame character creation system or choosing the option to just use your Mii.
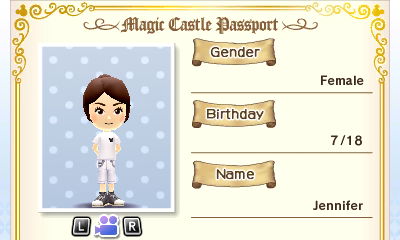
The character creation contained several more options than I expected to be honest and I was overall impressed with it for what it was. I would’ve liked to see longer hair–all the hair is fairly short. You can get wigs ingame though (several which are a bit longer), but you can’t wear head accessories with them. As a note, Miis can wear everything the ingame avatars can unlike in Animal Crossing where you can not wear any head/face accessories or hats/wigs.
In fact, there are tons of items in the game–over 140 item sets with most (if not all) sets containing 2-4 items each for your character to wear and every single item is Unisex so if you want to make a guy character and run around in a ballgown with Belle’s hair, you can.
Besides outfits, most of the items you make (Furniture, Food items for the Cafe, Clothing) involve scavenging/fishing for items through the maps themselves, Episodes in the various worlds, and doing tasks/favors for various Residents and Disney Characters in Castleton. These requests have a time limit (as residents and Disney characters wandering in Castleton, the shop stock for Scrooge’s Shop and stalls in Agrabah, and the favors you have reset/change over in the evening–though, Cafe Requests last until the next day), but there’s no penalty for not completing them.
This game honestly manages to handle real time incredibly well. They give you A LONG time to get all the items for events. There are no repercussions for failing to do something–you can literally go months without playing, come back, and everything will be as you left it. The only “bad” things are you could miss a chance at an item you really want (though, the item can show back up again eventually) and that your plants will be in stasis if they take more than an hour to grow (as they’ll be waiting for you to water them again–Weeds can also grow in the garden, but it’s not very many at all… especially compared to Animal Crossing)–but they won’t ever die. You will never be at risk of losing ANYTHING just because you didn’t play.
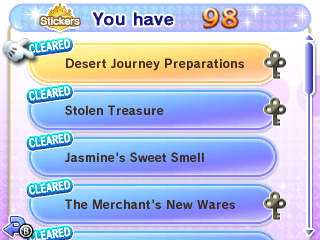
To progress in the game, besides continuing to earn money through your cafe (The best way to earn coins), you need to accomplish things to earn Stickers–getting a specific number of stickers will unlock certain areas of the game along with new episodes in each world. For example, to unlock the “Episode” area in Castleton, you require 60 Stickers (and a total of 80 to unlock all 5 floors). There are 100 Stickers total in the game–some easier to get than others. Stickers are divided into 8 sections–Prologue (which you will complete before unlocking the rest), Outfits, Fishing, Cafe, Photos, Episodes, Farming, and Secret. They are all pretty self-explanatory, though, to give a little more information on Secret… it’s essentially for completing harder bonus challenges.
While most things are unlocked early on (The Cafe at 10 and a bedroom at 30), you need 90 stickers and 95 stickers to unlock the final clothing and furniture recipes respectively so you do need to work hard if you want to get everything. Not everything can be unlocked with stickers though–many items you can only get from Scrooge’s Shop or through doing favors for Residents and Characters which can give you the item itself or brand new recipes to make these items.
The Worlds, Episodes, and Music/Sound
There are 4 Worlds besides Castleton (excluding DLC):
-Cinderella’s World
-Wonderland
-The 100 Acre Wood
-Agrabah
Each has their own story to tell, the characters you’d expect, items to scavenge around town, and various amounts of Episodes. Episodes are essentially “quest” areas that usually involve you more or less going through a Dungeon collecting treasure and fighting ghosts using a Wand. This may sound simple enough, but it’s really not–ghosts require different strategies for different types (blindly mashing your button could end up killing you versus saving you) and you will be introduced to harder ones as you go on.
Not all Ghosts are bad though–such as Gift Ghost:
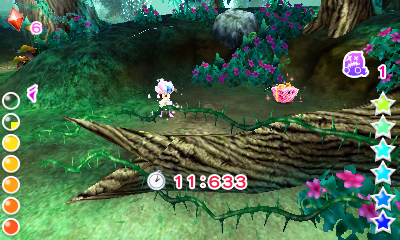
Gift Ghost’s catch is it won’t stick around long so you need to defeat it very quickly. Defeating it will usually give you some rare items, red gems, and a Power-up–Showtime. What it does is play some festive music which stuns all ghosts (they are too busy dancing), makes you immune, and gives you infinite MP. It doesn’t last too long, but it can be quite helpful.
Episodes are one of the biggest ways to earn items so you will be doing them often. It’s also the second best way to earn money as you can get many 1K and 5K bags later on.
Plus those with a “key” next to their name are required to unlock more of that World’s Story and allow access to other areas–for example, you can eventually go to Cinderella’s Castle in her world and you will unlock more stalls to shop at in Agrabah.
The dungeons have various mechanics in them–from switches to hidden areas to random things you can scavenge and chests you can open. You have 3 health and 2 magic points to start with (and not that high of attack), but these can be increased by creating quest outfits and better wands. Wands have three attacks–the standard attack, a charged attack, and a heavy attack. The Heavy Attack is the only one that uses up your Magic Points and depending on the wand, the heavy attack can change (For example, the Cinderella wands have a swirly kind of magic attack while Agrabah’s wands have a tornado).
The catch is those outfits and wands are only effective in their respective areas or Castleton’s. I’d like to point out you do NOT have to wear these–you can go in with whatever you want (even no quest outfit if you choose) and whatever wand you’d like, but you won’t get any bonus magic points, health, or attack power. I wouldn’t say it’s impossible if you do that, but it’s definitely incredibly hard–I’ve been one shot with the best wand and outfit before in some dungeons. It really depends on the enemy you’re up against. One of the nice things is you do not have to dress up ahead of time to start an Episode–it’ll prompt you when you choose it with its recommendation and you can choose to accept it or choose yourself. Once finished, it will change you back to what you were wearing before you entered. As a quick note though, dungeons are not randomized in this game. Treasure Chests and other lootable things (plus the contents) are, but the map, ghosts, and mechanics are always the same.

One of the biggest things to keep an eye on though are the red gems in the top left corner. Those gems have many functions. For example, they revive you if you get defeated–it requires 2 gems the first time and 3 gems for every time after that. They also completely recover your health and magic points. However, there’s a catch–at the end of every Dungeon is a large chest that takes all your red gems from you (You can NOT keep those gems and save up–you have to use them before you leave or they’ll just be taken away)… The more red gems you have, the more items you will get and the higher the chance for rare items. This means you really don’t want to waste those red gems if you don’t have to. Red Gems are gotten randomly from defeating ghosts and can sometimes be found from harvesting and opening treasure chests as well. You can not heal your health any other way unfortunately, though, little blue stars drop from defeating enemies that will heal your magic points from using Heavy Attacks.
You can not leave a quest area once you’ve started (with a few exceptions) unless you give up or are defeated. Castleton’s Dungeon is one of the biggest exceptions to this and the red gems. More or less, Castleton’s dungeon starts at 60 and unlocks a new floor (up until Floor 5 at 80 stickers) for every 5 stickers. You can leave at anytime after completing a floor and each time you complete a floor, a big chest that you can use all your red gems on will appear. The further you go, the rarer the items and obviously, the more gems you have, the more items you will get (and rarer as well) so it’s up to you if you want to risk it and hold onto your gems until the end, keep opening each chest as you go, or if you don’t want to continue to risk anything and just leave the dungeon before completing every floor. This is considered the hardest dungeon in the game, but I’ve actually had an easier time with it versus some of the episodes in Wonderland and Agrabah.
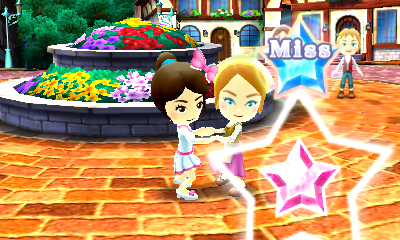
Cinderella’s World has the easiest ghosts, in my opinion, with the exception of their overall World Ghost which is somewhere in the middle difficulty-wise. One of the neat things though is Cinderella’s World has two different kinds of episodes–besides the usual Dungeons (mentioned and briefly shown above), they also have Balls which are a rhythm minigame.
With the exception of the first ball, each one has 3 difficulties. There are a total of 4. You can also choose to practice at anytime with the lady closest to the center in the plaza of Cinderella’s World.
Wonderland has probably the zaniest dungeons which should be expected. The ghosts are incredibly annoying (though, not necessarily hard with the exception of the ones with the hammers) and it can be a bit frustrating. It is also the only World to have two episode boards.
Wonderland has the easiest boss, in my opinion, which actually surprised me due to the difficulty with some of the sub-bosses.
The 100 Acre Wood has the easiest episodes because they don’t involve dungeons at all. They just involve being a good friend to Pooh, Rabbit, Piglet, Eeyore, Owl, and Tigger. And well, gardening too.

I actually really like the 100 Acre Woods because it’s rather relaxing and has some of the quickest Episodes (Episodes can last anywhere between 5-40 minutes depending on how it goes, though, I’ve definitely spent longer in some). It also has a lot of episodes based on stories and episodes from the show and books and it’s just such a nice wave of Nostalgia.
You can leave the 100 Acre Woods during most episodes since gardening can take a while (some seeds can take as long as 3-4 hours while others are as short as 3 minutes). It’s a nice way to relax or kill time inbetween the more action-packed episodes though.
Agrabah has the hardest ghosts and areas–filled with various traps to go along with mechanics, fire pits, and just in general really difficult/frustrating ghosts. It also has the hardest boss. It has some neat cutscenes near the end of various dungeons though so it does have its merits despite difficulty–I also feel it has the most fitting music.
Speaking of music… the game sadly didn’t put very much time in it. It’s generally the same several chords over and over again and while that works well in some areas (Agrabah’s Dungeons, the 100 Acre Wood), it feels rather grating in others… Wonderland has the worst of it as it is purposely out of tune/not very pleasing to the ears which while fitting the environment, I do find myself getting a headache after a while from listening to it.
Characters are also not voiced in any of the worlds outside of Castleton and the ones that are voiced in Castleton are mostly the main gang (Mickey, Minnie, Goofy, Pluto, Chip, Dale, Daisy, Donald, etc.)–though, only a few of their lines are translated and it might be better this way as after a while, you get really tired of walking past or being close to them and constantly hearing the same line repeat. It’s definitely a nice feature to hear those character’s voices, but the constant repeating can ruin it at times. Especially when trying to get something.
For example, to unlock new furniture when you have enough stickers you need to interact with the Sticker Emblem that is right inbetween Chip and Dale. More often than not, I end up talking to them first several times before I finally get my character aimed correctly to interact with it. Similarly, there are areas (such as the node right next to Dale or the farm after Pooh and friends help you out with watering or pulling weeds) that are so close to characters, it makes it hard to actually do what you want to and can take a bit to angle your character correctly so they’ll stop trying to talk to everyone.
The Cafe, Pictures, Farming, Fishing, and Collecting
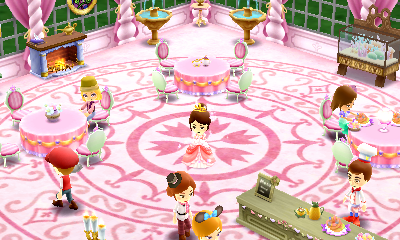
The Cafe is essentially your main role in the game (Yes, smacking ghosts with magic is actually your secondary role). You have been given the deed and it is now yours to make awesome. You get to design the Cafe however you’d like with various wallpaper, flooring, and decorations. You can even dress-up the staff and change how the Helper looks to a Mii. You can not change the Manager’s physical appearance–I’m guessing because he is an actual character in a way–though, your character replaces him in the Cafe when visited and you can still dress him up.
Eventually, you’ll even unlock a room upstairs from the Cafe which works as your bedroom. You will get at least 1 gift a day on your bed from those who had visited your cafe (contents are random). Unfortunately, the Cafe and your Room can only hold 30 items each… which is actually closer to 25 for the Cafe and 27 for your Room as the Cafe has to have a table, chairs, wallpaper, flooring, and counter set while your room has to have wallpaper, flooring, and a bed.
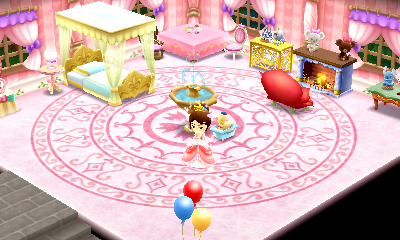
While the rooms aren’t huge, this is still a rather small limit and does include items on walls and put on tables. With such a large amount of items in the game (over 300 pieces of furniture without even counting DLC), being able to use less than 20% in each is really disappointing.
The hard thing with the Cafe though is the food. You can pick one snack, one drink, and one dessert. Ignoring that everything is super adorable and it can be hard to choose…
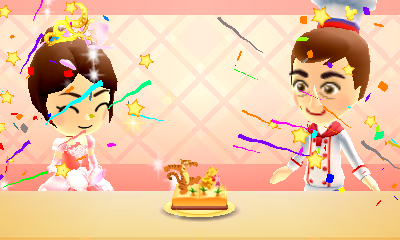
…Some ingredients can be incredibly hard to get and you need them every single time you make a dish. For example, the dish shown above requires 2 not so bad ingredients and a Spooky Carrot… the only way to get a Spooky Carrot is by chance when harvesting a Honey Carrot which is a seed that isn’t that easy to get from certain Episodes in Wonderland. The Royal Rose, Special Legendary Flower, and Rainbow Honey are some of the worse things to get due to having to use methods like that and yes, all of those are ingredients in dishes (and two are used in furniture)… some of them in the same dish.
I really wish it was like Restaurant City where once you unlocked it, you can always be able to make it–even if it meant you’d need more than one of each item to do so because some of those rarer ingredients I’ve just gotten extremely lucky and I don’t know if I’ll ever be able to do them again… As long as I can create each once though, I’ll be happy.
Unsurprisingly, dishes that use rarer ingredients sell for much more. You will be able to make more dishes as your Cafe Rank goes up (maxing at 150 portions made at a time) and 150 x the 300 cost of the dish is a very nice profit. You can still make a good profit with cheaper dishes as well though. You can also sell clothing items and scavenged items to Scrooge in his shop, but I personally never felt like it was worth it to sell to him as you rarely get much. I mostly just find myself selling to him if I hit the maximum amount of an item (99).
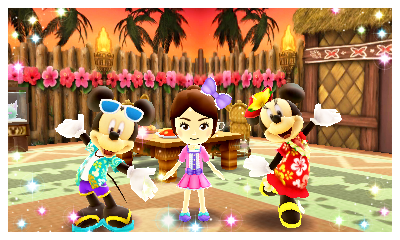
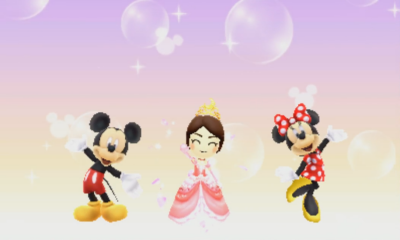
Of course, the Cafe also has another way to earn money besides just selling the food you made… When your party meter gets full, you can host a Party which will immediately sell out all your food. The more themes you have set, the more coins you will get (For example, a theme with all 8 combos gives you 30K). If you have two or more of the same theme, there is a chance characters matching that theme will show up–which characters depend on whichever theme has the most (and if tied, picked randomly)–though, regardless of which theme is chosen, the characters who show up from that theme are random. For example, Stitch’s theme can cause either him, Lilo, or both of them to show up.
If at least one character shows up, you can talk to your Manager to summon Cameron to take a picture of you with them. Besides the pictures needed for Stickers, pictures have their own album and kind of serve as their own bit of accomplishment (though, the album can only hold up to 100). You can get pictures from Parties, helping a character out with tasks or Episodes, and from accomplishing certain things (such as when you first open the Cafe). As a bonus note, autographs aren’t as big of a deal (or even really done) in Tokyo Disney–pictures are a lot bigger which is why that’s the focus over an autograph book or both.
Moving on, Farming/Gardening in the 100 Acre Wood is something you will be doing a lot. Many ingredients you can only get as seeds and you will have to plant them.
You earn more plot space as you complete episodes in the 100 Acre Wood. One thing to keep in mind is that not only do you grow ingredients, but there’s a special mechanic with Honey where depending on which flowers and herbs you grow determines what kind of Honey you will be harvesting so you might not want to just harvest everything immediately if you want different Honey than normal.
It’s relatively easy and works in real time (though, your flowers will never die on you–the only things that expire are power-up plants that only last for so long) so some patience is involved. The only real frustrating parts can be if a character is in the way when trying to plant/water/pull a weed or when you really need a seed and the only way to get it is by chance of harvesting this other plant.
Fishing is quite… interesting in this game to say the least. It’s a combination of Animal Crossing’s and Harvest Moon’s. There’s shadows that pop up that you need to throw your lure near… hitting a fish with it will scare it away so aim carefully (and prepare as it could swim up right into your lure as it lands).
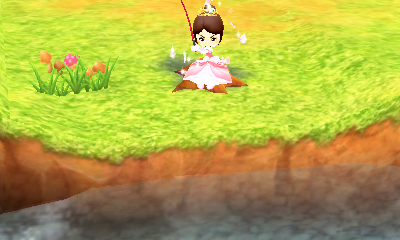
Similarly, fish close to where a fish pulls down on it will also be scared away. The fishing mechanic works by hitting A every time you’re prompted to (and when the lure is initially pulled down) so it’s not just once like Animal Crossing (though, you can catch one as quick as two hits) or constantly like Harvest Moon. Do it too much or too little and you won’t get your fish. You don’t keep the fish though–instead, they open their mouths and give you the item. Many exclusive items and seeds can only be gotten from fishing. There are 4 different rods and getting each one requires you to complete tasks for Donald to get the recipe and then make them.
Collecting is a big thing in this game. In fact, you even have a Collection icon right next to your Albums. There is a large amount of stuff to do beyond just getting 100 stickers if you care enough to do so. Besides all the outfits I mentioned earlier, there’s a Card Album with 300 cards to collect, the Photo Album with lots of pictures to collect if you want to do all the themes, 23 Wands, 303 pieces of furniture, 126 Dishes, 21 Fish, and 70 Seeds. And no, that doesn’t even count DLC.
One of the nice things about cards as well is eventually (52 Stickers) you can unlock the Chamberlain who will trade you a card for every 3 duplicates you have. You are not able to select cards you just have one of so you don’t need to worry about accidentally picking a card you wanted to keep. Plus, as you earn more cards you will unlock new greetings from the Chancellor and King:

The greetings can be performed while going around Castleton and are how you receive cards from characters. You can set 4 different ones to the D-Pad.
Online Content
So, as mentioned above, there’s DLC in the game! I’d like to highlight the fact that none of the DLC is mandatory and if you do get any, it will not be counted in the overall total (so if you have all the wands and get a DLC wand, it’d be shown as 24/23). There’s paid DLC, free DLC, and DLC gotten through AR Cards so there’s lots of options. And again, none are mandatory (unless you want everything–but even then, you won’t see something like 15/20 because you won’t get DLC items).
There’s also SpotPass and StreetPass functions which have more or less the same outcome–SpotPass involves you going online to visit their cafe. You then have the option to give them a Nice (which transfers to their game) and then you will appear in their game and they can get a random card from you (and no, it’s not taken from you–all your cards are fine). StreetPass is similar, though, without the ability to give the person a nice. The person you passed will just appear in your game with a card to give you. For every 3 Nice ratings you give to people online, you’ll get one or more items. The last item is available at 75 Nice Ratings given.

My main issue with Online Content though is that it’s Region Locked… Yep, you can only visit the cafes of those in the same region as you. This applies to both Wireless and WiFi Content so if you have a friend with a different region game, you can’t visit them. I don’t understand why–especially as the AR Cards are not region locked, but for whatever reason visiting Cafes in other regions is… I mean, there’s Disney Parks in various regions so this seems like a huge oversight.
My other big issue is you can only gift friends wirelessly–not over WiFi. For a game that is mostly getting attention from people who play games where you can gift online and help your friends out, this seems like a huge flaw. Even though the game is mostly single player, even Harvest Moon added the functionality in both of its games made for the 3DS. There are definitely times where I keep getting the rare items I don’t want and not the rare items I do and it’d be nice to be able to trade with friends.
Final Thoughts
In short, the game has a lot of content and is filled with things to do. There’s Seasonal Events, so many items to collect, and just all kinds of things to enjoy. Plus, who doesn’t want to wander around in a world filled with their favorite Disney characters? Going to Disney World isn’t always possible for everyone after all.
One thing I realized I didn’t mention too much when I mention how layered the game is is how much attention to detail it has. For example, while there isn’t MUCH voiced, they actually voiced some of the characters saying stuff about Easter during this period (and I would assume other holidays as well) and beyond scavenging stuff, you can actually interact with many things to both make an observation note (Commenting on something) or actually do something–such as actually sitting and swinging on the swing near the pond or sitting on a bench or near your cafe.
I was really surprised when I got to sit on the stump in front of Chip & Dale’s too. There’s just so many little touches that really show how much time they put into it. Plus fireworks every evening from 8:30PM-9PM are always nice too. That said, I’m really hoping the game will bring over some more things from Tokyo Disney like the UniBEARsity Line.
The only really big flaws to me are some of the online stuff restrictions, but if you don’t care about playing with people it’s not a big deal. Similarly, the ingredient frustrations. While it’s not terrible, the needed luck for seeds and having to hope you get lucky enough for a better version when harvesting can be quite discouraging. Especially when what you need to even begin is rather rare as well.
I also wish there was something similar to the items that drop to heal magic that healed health instead (even if rarer)–I can understand why there isn’t (with how the red gems work), but still kind of frustrating.
Plus, item limits always stink. 🙁 I’ve always seen people do great jobs with items in the room size they are given so I’ve never been fond of the idea of having a limit to how much someone can fit in there.
As a final note, if you are expecting some easy game you can blitz through, you are in for quite a surprise. Even if you change your 3DS’ clock ahead to go through days quicker, the game has many layers, items to collect, and a large luck factor that changing your clock won’t really make it any easier. I think many people will be surprised by how difficult some things can be–especially as they get further into the game.
But yes, if you think this game sounds interesting, do give it a shot. I’d love to see it get more attention and truly feel it deserves it. Hopefully it will encourage them to make more DLC Worlds as well.
———————————————


Comments (0)